Hello! Remember me? Sorry for neglecting you guys....Things have been super busy/hectic around here these days. A lot of change is happening at work and I have been super stressed. Our annual self appraisals were also due this week and I was not in any mood for them. Naturally, I procrastinated til the last second, which only caused more grief. And this coupled with little sleep = not much time for sewing/blogging/anything fun.
But just as I thought all hope was lost, I finally got some one of one time with the sewing machine today and cranked out this super sweet Casserole Carrier! Isn't it awesome?!?
I used a fabulous tutorial from Christina over at 2 Little Hooligans. It was so easy to follow! However, I did make some slight changes following this version of the carrier from Jill, at Homemade by Jill. Don't you just love those etched glass pans?!? What a cool idea!
Anyway, this carrier was really quick and easy and I totally recommend making one or more for yourself! I made this carrier for a coworker who just got engaged. Sorta like a "Happy Engagement" type thing. She loves to cook and always brings in super delicious things so I think she'll really like it. At least I hope she will : )
I'm just praying things get back to normal soon cause this whole not sewing thing is really starting to get to me.
Tuesday, March 19, 2013
Wednesday, March 6, 2013
Swooning
Remember this guy??? I decided it was about time I tackle my WIP List for 2013. Some of these projects will be on going as they are just plain going to take forever. But some I know I can get going and finish in a reasonable amount of time.
Which brings me to Swoon by Camille of Thimble Blossoms. Oh how I love this pattern! I'm not sure what draws me to it exactly...maybe its the fact it is simply beautiful or the fact that its comprised of 24" blocks and makes one mother of a quilt when you're done! I had to buy fabric for this quilt which kind of bummed me out...wait a minute, who am I kidding, no it did not! Any excuse to buy fabric is a great excuse! Even though I said I wasn't going to...shhhh...But in all seriousness, I apparently really love grey and chartreuse and was out so I needed to build a tiny stash to start this project.
I always hate the cutting part, but I'm almost done so hopefully I can start piecing soon and begin swooning! Updates are sure to follow so stay tuned!
Btw, I finished my pincushion! Isn't it purty!!! I had so much fun making this! What a great tutorial!
I filled mine with crushed walnut shells instead of batting. It gives it more weight and sharpens the pins you stick in it. You can get it at pet stores, apparently its used for snake bedding. I know, I know a little gross, but its totally worth it. I'm less happy about the quantity. I am now the owner of 10 quarts of
Friday, March 1, 2013
Friday Finish?
Here there! Just a quick post to show you what I've been working on. I found this really awesome tutorial the other day on Moda Bakeshop's website for a darling Cathedral Window Pincushion. The original tutorial come from ingenious brain of Kim from My Go-Go Life. I thought it was absolutely adorable and knew I had make one. This is what I came up with.
As you can tell its not completely finished....still need to stuff it, but you get the point :) This little pin cushion is great for scraps. I used some extra Innocent Crush I had, I really love that line, the colors are so yummy! Hopefully, I can stuff and button this bad boy tomorrow. Toodles!!!
Tuesday, February 26, 2013
Feature and a Hat
So I have some super exciting news to share....

That's right!!! I just think this is the coolest thing ever! I started shrieking when I saw the post! Literally. The whole reason I started a blog was to share and network and meet new people. And I can't believe its becoming a reality. The internet is sooooo awesome! Heather and Megan from Quilt Story are some really awesome peoples. You can see my feature and many more inspirational posts here.
Ok, phew, got that off my chest! Sorry, I'm just really excited!
Anywho...back in December I made some quick impromptu gifts for my friend's son.
Isn't he soooo stinking cute?!?! As you can see he really loves Buzz. I made the hat and scarf from fleece and I was initially happy with the results. The only thing was, I wasn't sure how to deal with the seam on the hat since I didn't want it to show when you turned the brim up. So I doubled the layers so the seam would be concealed. Problem was it made the hat super bulky, making it hard to tie off the pom pom, and the thickness messed with the finished size. It damn near didn't fit him.
Fast forward a month and baby number two came! Which only makes more opportunities for cute handmade gifts!
So last night I re-pondered the hat and decided to keep it one layer and do a french seam instead.
The pom pom is a little less full, but I think this is the way to go. Its light but warm and I'm happy with how the seam worked out. These hats are so cute and easy I might just make one for myself! Pom poms are acceptable at 26 right?

That's right!!! I just think this is the coolest thing ever! I started shrieking when I saw the post! Literally. The whole reason I started a blog was to share and network and meet new people. And I can't believe its becoming a reality. The internet is sooooo awesome! Heather and Megan from Quilt Story are some really awesome peoples. You can see my feature and many more inspirational posts here.
Ok, phew, got that off my chest! Sorry, I'm just really excited!
Anywho...back in December I made some quick impromptu gifts for my friend's son.
Isn't he soooo stinking cute?!?! As you can see he really loves Buzz. I made the hat and scarf from fleece and I was initially happy with the results. The only thing was, I wasn't sure how to deal with the seam on the hat since I didn't want it to show when you turned the brim up. So I doubled the layers so the seam would be concealed. Problem was it made the hat super bulky, making it hard to tie off the pom pom, and the thickness messed with the finished size. It damn near didn't fit him.
Fast forward a month and baby number two came! Which only makes more opportunities for cute handmade gifts!
So last night I re-pondered the hat and decided to keep it one layer and do a french seam instead.
The pom pom is a little less full, but I think this is the way to go. Its light but warm and I'm happy with how the seam worked out. These hats are so cute and easy I might just make one for myself! Pom poms are acceptable at 26 right?
Wednesday, February 20, 2013
Semi Simple Drunkard's Path
Today I wanted to share with you a tutorial for an easier way to make a drunkard's path block. I love the drunkard's path pattern but always hate all the techniques to get to the final product. This tutorial allows you to make a machine stitched block much easier and faster then before. No more stabbing yourself with pins or dealing with curves and open bias edges. This super quick super fun process with have you making tons of drunkards in no time!
This process is completed using Dale Fleming's 6 Minute Circle. You can view a video tutorial of Dale's technique here, but in case you missed anything I'll show you step by step how its done!
*****Edit - 3/29/16*****
It has come to my attention that this technique has a name! It is called Piec-lique and was developed by Sharon Schamber. Here is a link to her daughters rendition of the tutorial.When I originally made this post way back in February of 2013, I did a ton of searching and couldn't find anything on the topic. Thank you to Lani for commenting about the technique and bringing it to my attention. And as promised credit where credit is due! :)
********
This tutorial will make four 3.5" finished blocks.
You will need:
a background fabric
a contrasting fabric
fabric safe glue stick (I don't think mine is, but its all I had :)
freezer paper
scissors/rotary cutter/ruler
Ok, here we go! Please ignore my poorly manicured hands!
Step 1: Cut a piece of freezer paper into an 8.5" square. Then find the center and using a compass ,either bought or homemade, draw a 5" diameter circle. Then cut it out like this!
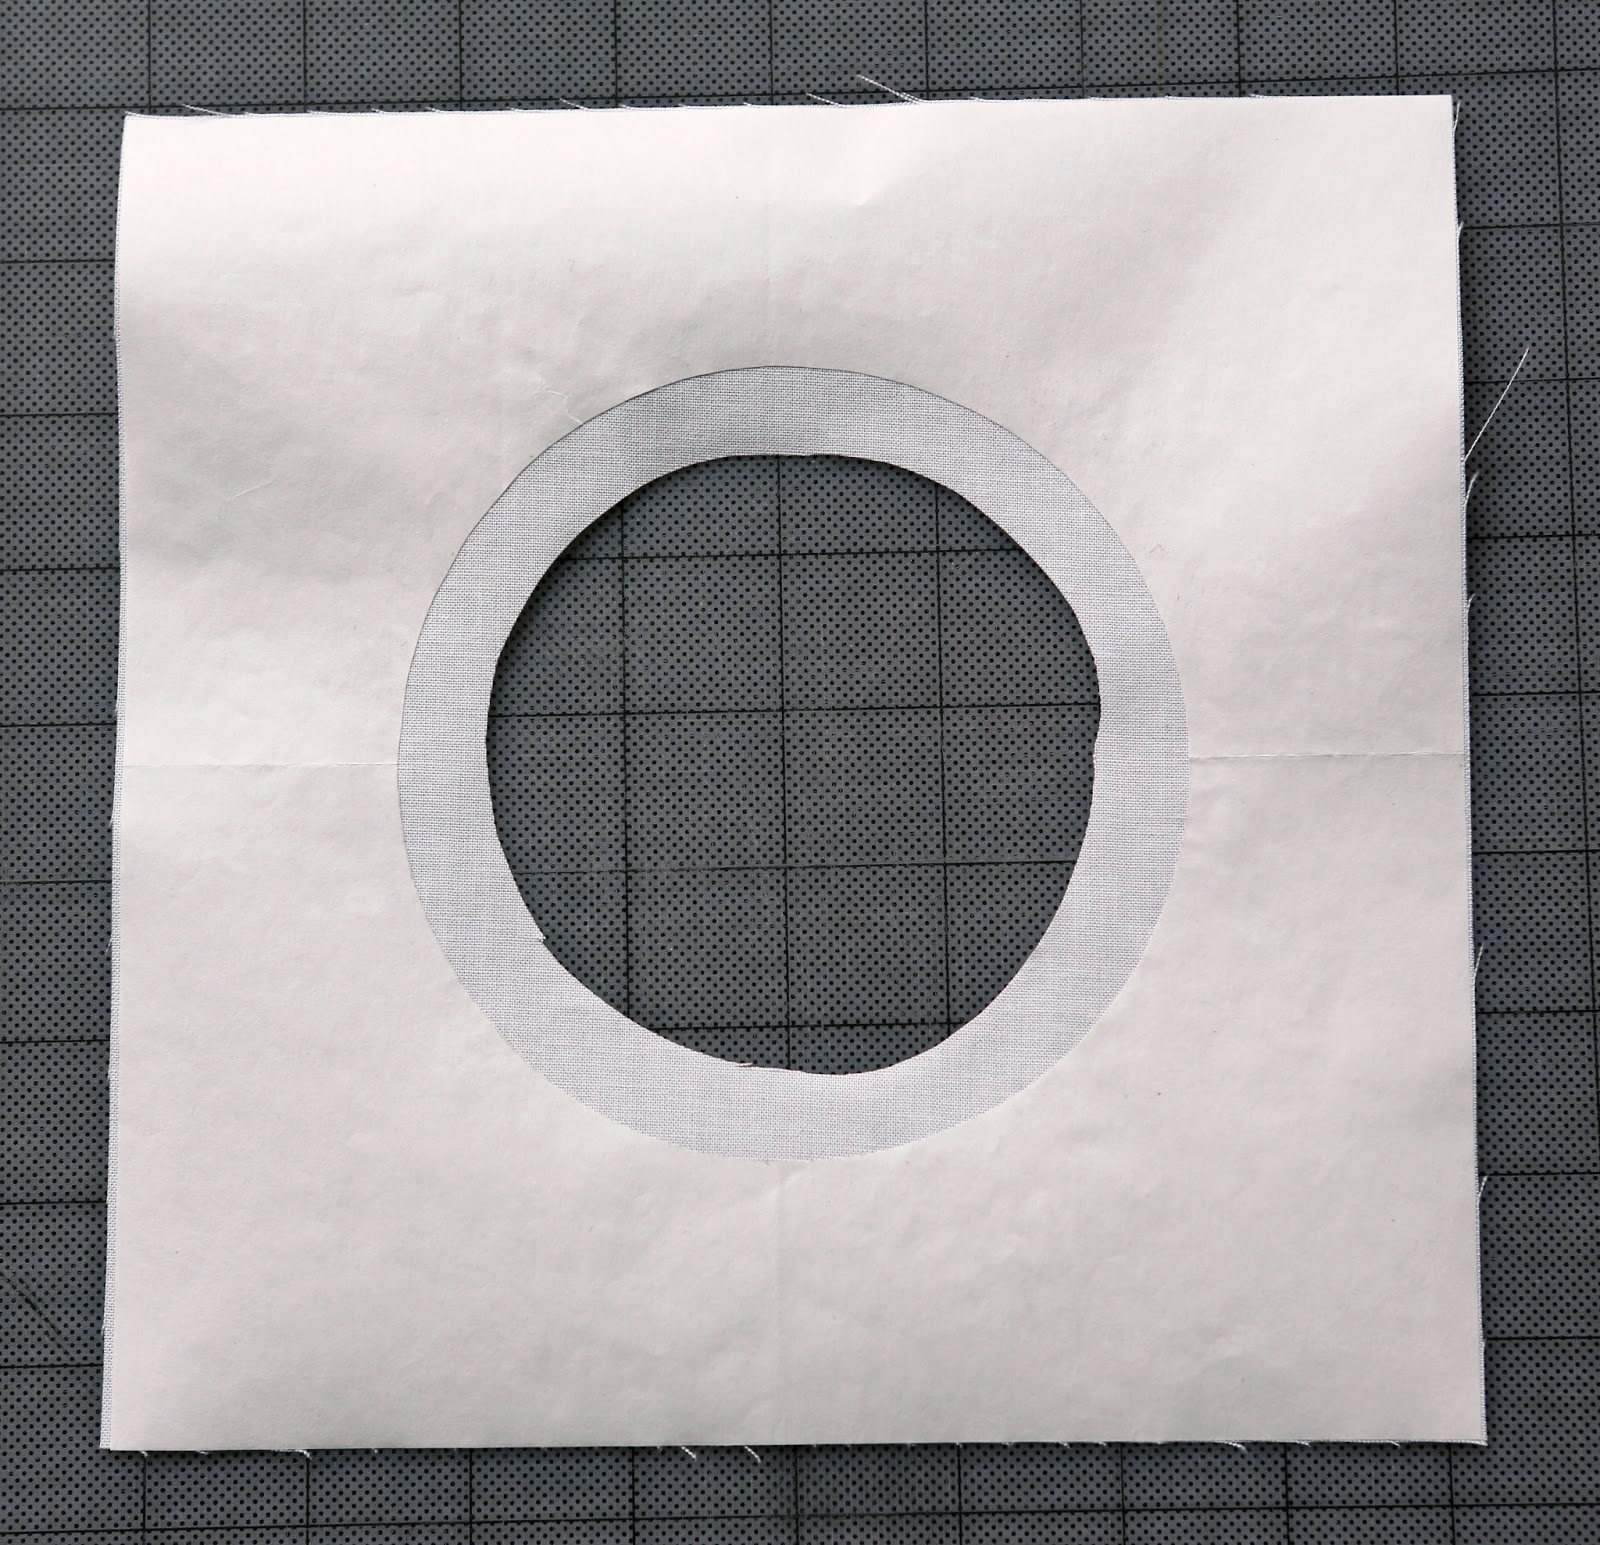
Step 2: Cut your background fabric into an 8.5" square. Match up your background fabric and freezer paper template, wrong side of fabric to the waxy side of template. With a dry iron, iron your template to the fabric. Using your rotary cutter, cut out the inside of the circle leaving approximately a half inch allowance around template.
Step 4: Run a light bead of glue on the edge of the paper template and with your fingers and iron gently press snipped edge around the template being careful not to burn yourself. You may have to reapply a little glue as you go. Make sure you pull tightly enough to form the circle shape, but not so tight as to warp fabric. Press thoroughly.
Step 5: Cut a piece of contrasting fabric large enough to cover the hole and have about a inch extra all the way around.
Step 6: Next, run another bead of glue around the folded edge of the fabric. I like to start from the center out and do dabs rather then in a circular motion so the edges don't catch.
Step 7: Position background fabric over the contrasting fabric and press in place. You'll want to press both sides to make sure you have a good hold. Then carefully remove freezer paper template and set aside to use again.
Step 8: With zipper foot attached and needle as far left as possible begin stitching in the ditch all the way around circle. When you've finished, cut away excess fabric leaving a rough quarter of an inch seam.
Step 9: Cut block in half both vertically and horizontally. Then square up blocks to 3.5". Voila!!!
*Note: You can square up your block to 7" first then cut in half vertically and horizontally. Works both ways :)
Step 10: Enjoy!
P.S. This was my first time writing a tutorial so please feel free to comment or email if you have any questions!
Subscribe to:
Posts (Atom)